Guide to Unity VFX Shader Techniques
Learn a reusable shader-based workflow for creating lightweight, customizable VFX in Unity – with AI as your assistant, not a replacement for your skills. You provide the vision, text descriptions or visual references; the system helps bring them to life as closely as possible to your original intent.
Step 1/3Right-click the shader.
How It Works and Where It Plays
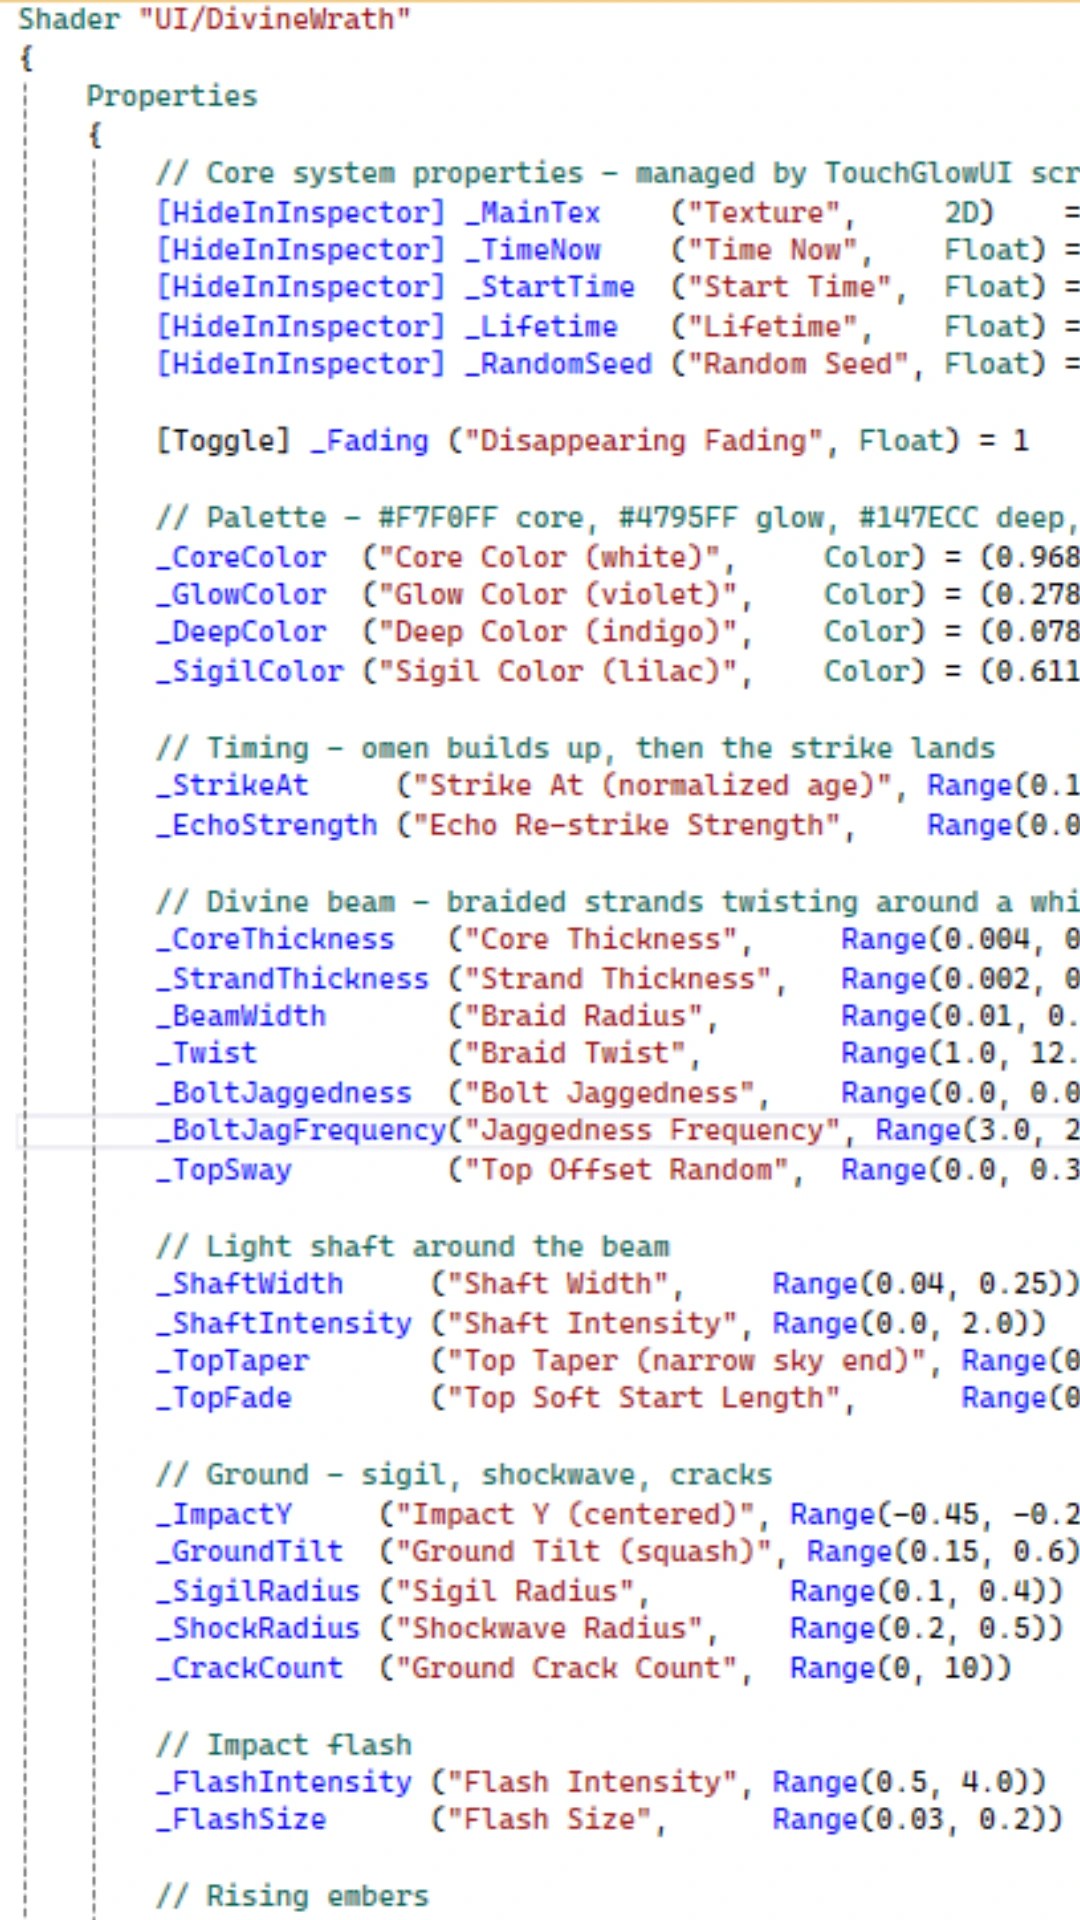
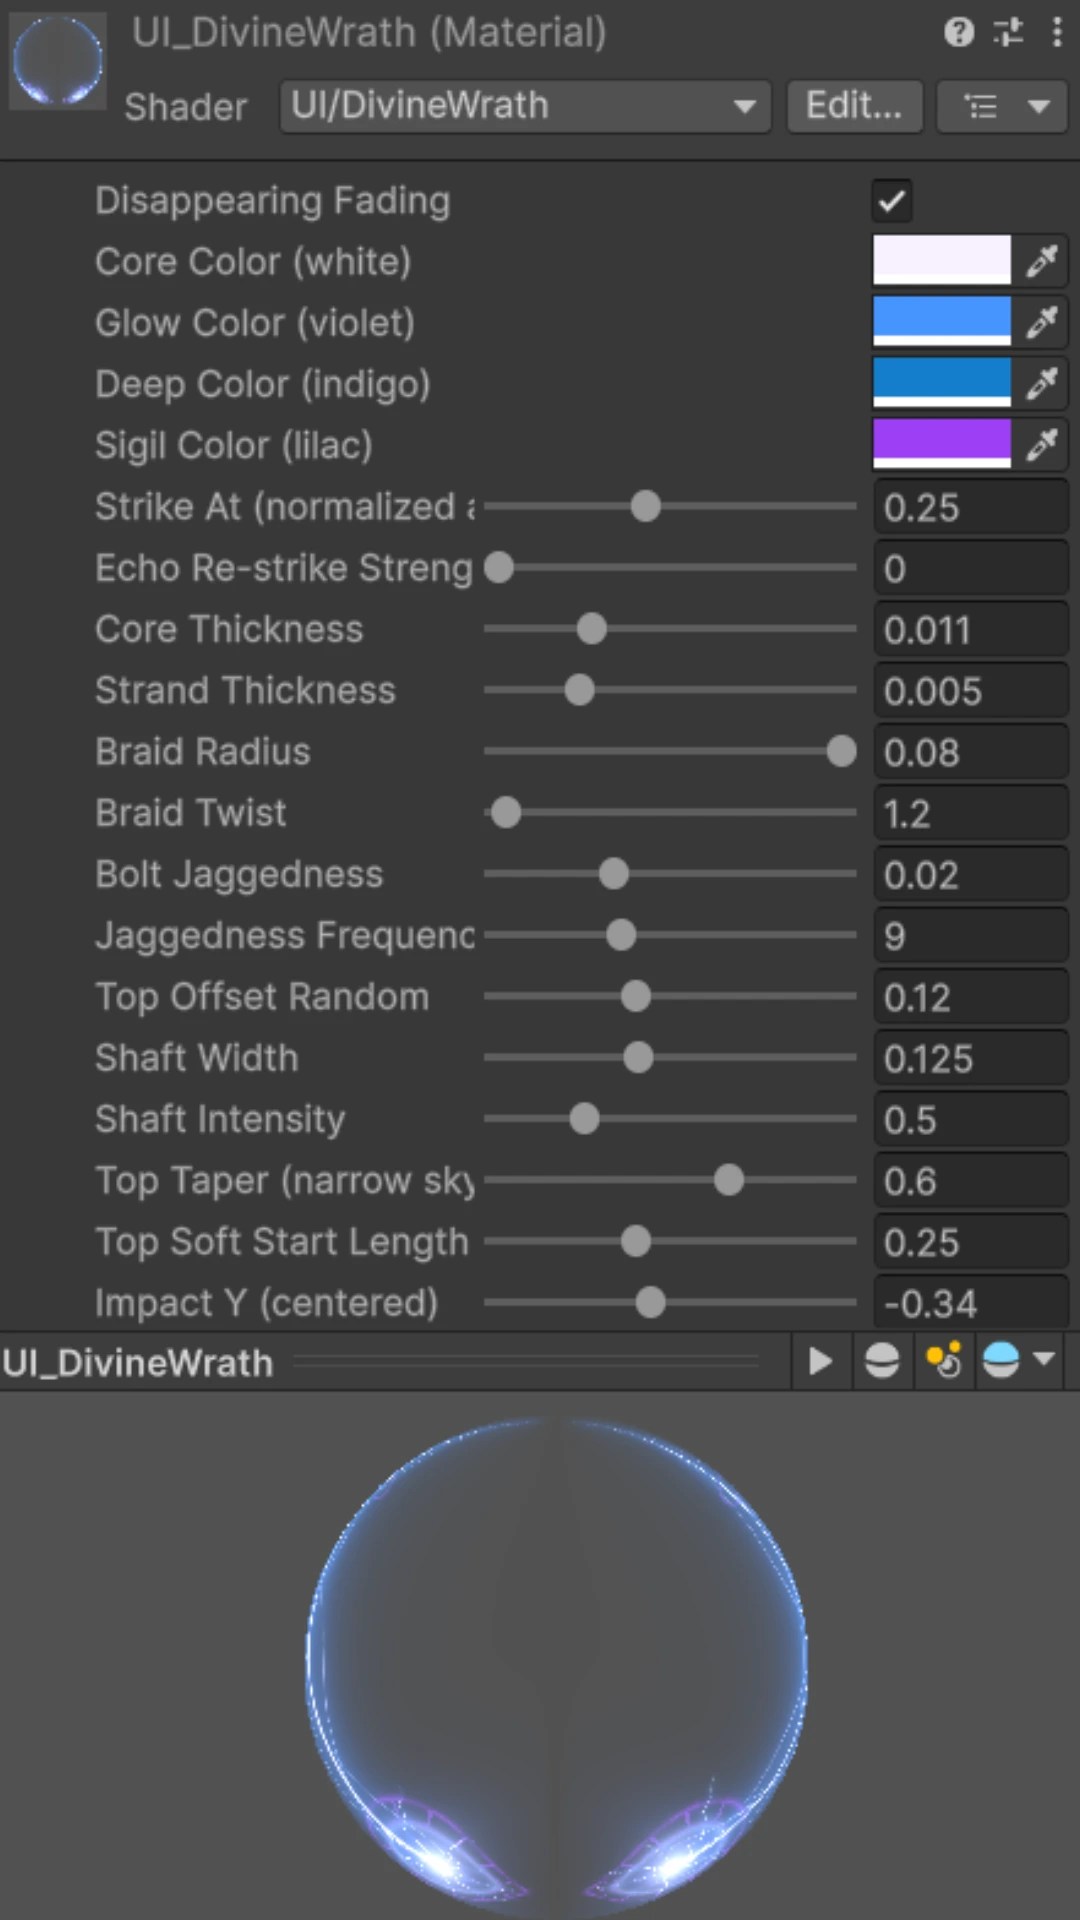
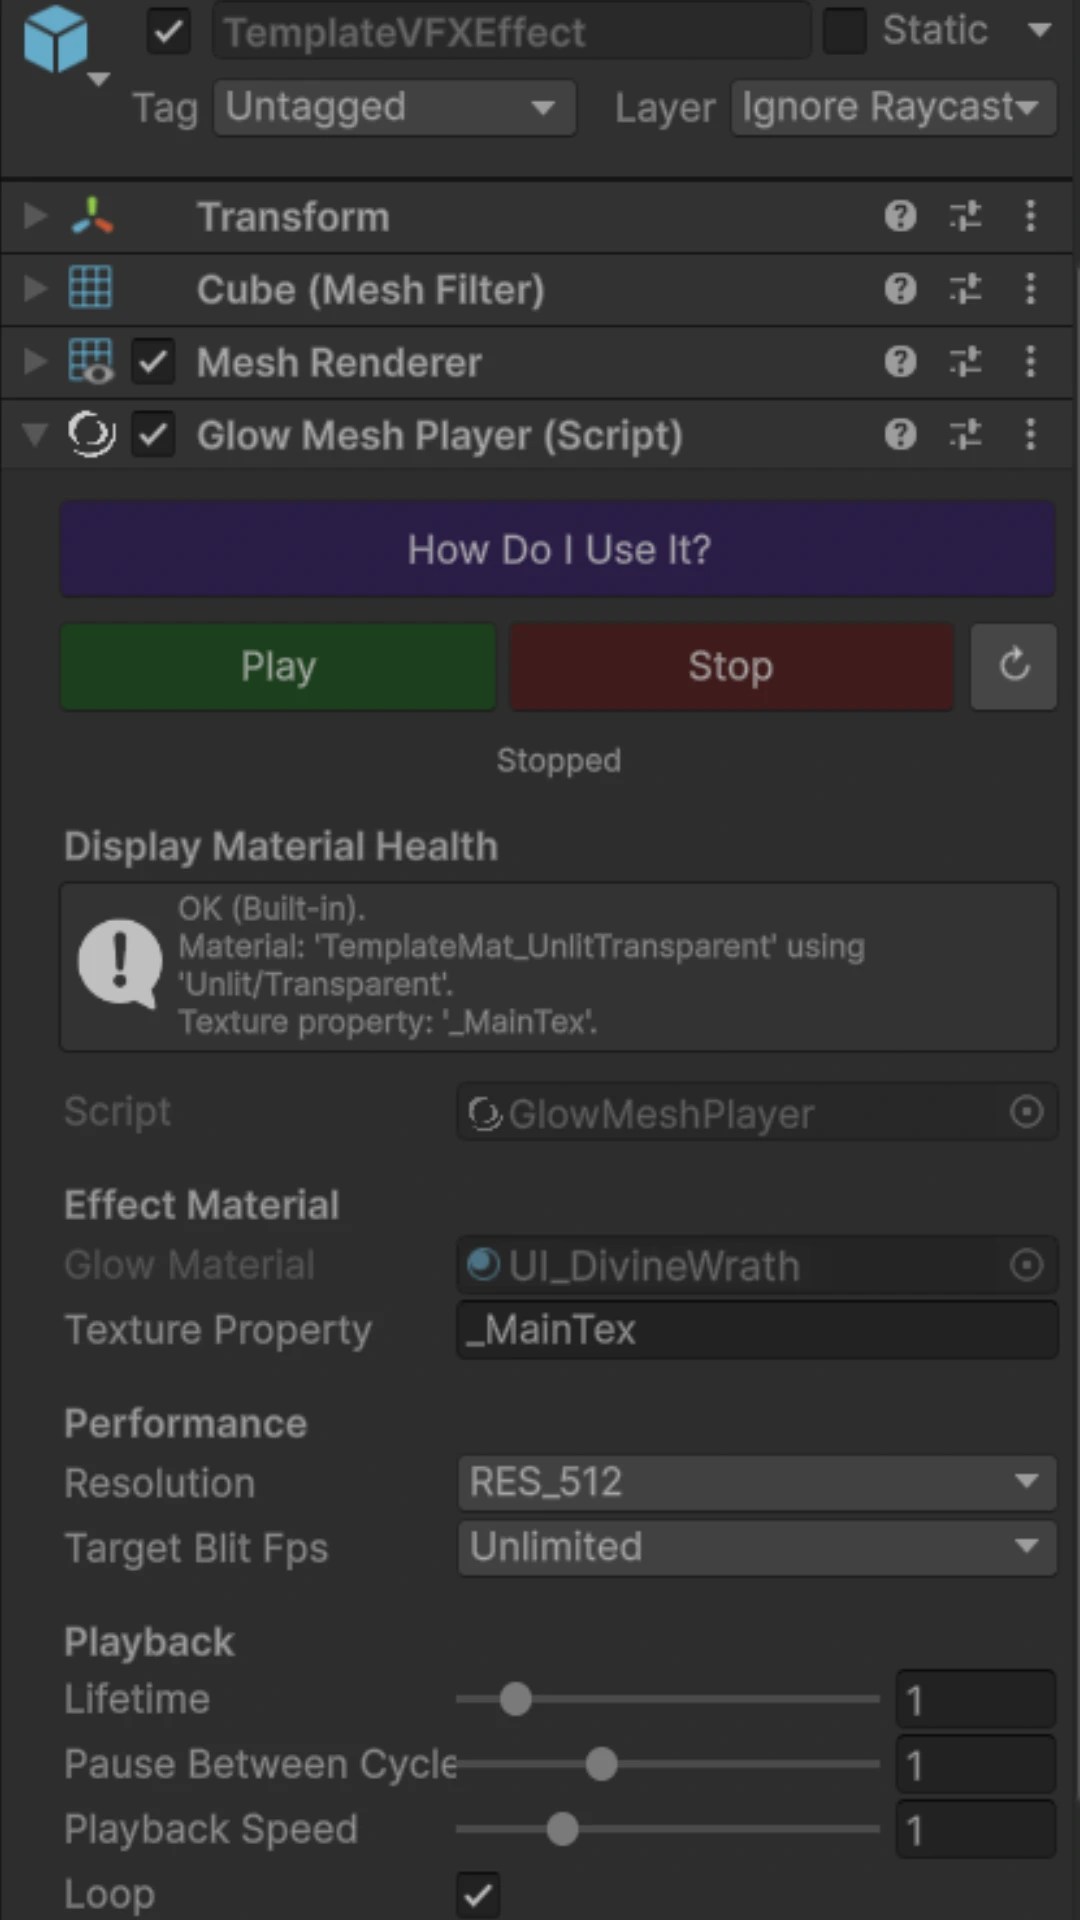
The effect's animation is written mathematically in a shader → the shader is turned into a material → the material is placed into a prefab with a player component.
When the prefab spawns in the scene, the effect animates on a transparent quad. It can be:
- A mark on the UI, from a tap or a game event.
- A hit in the world, one spawned particle.
- A finger trail on the UI (full version only).
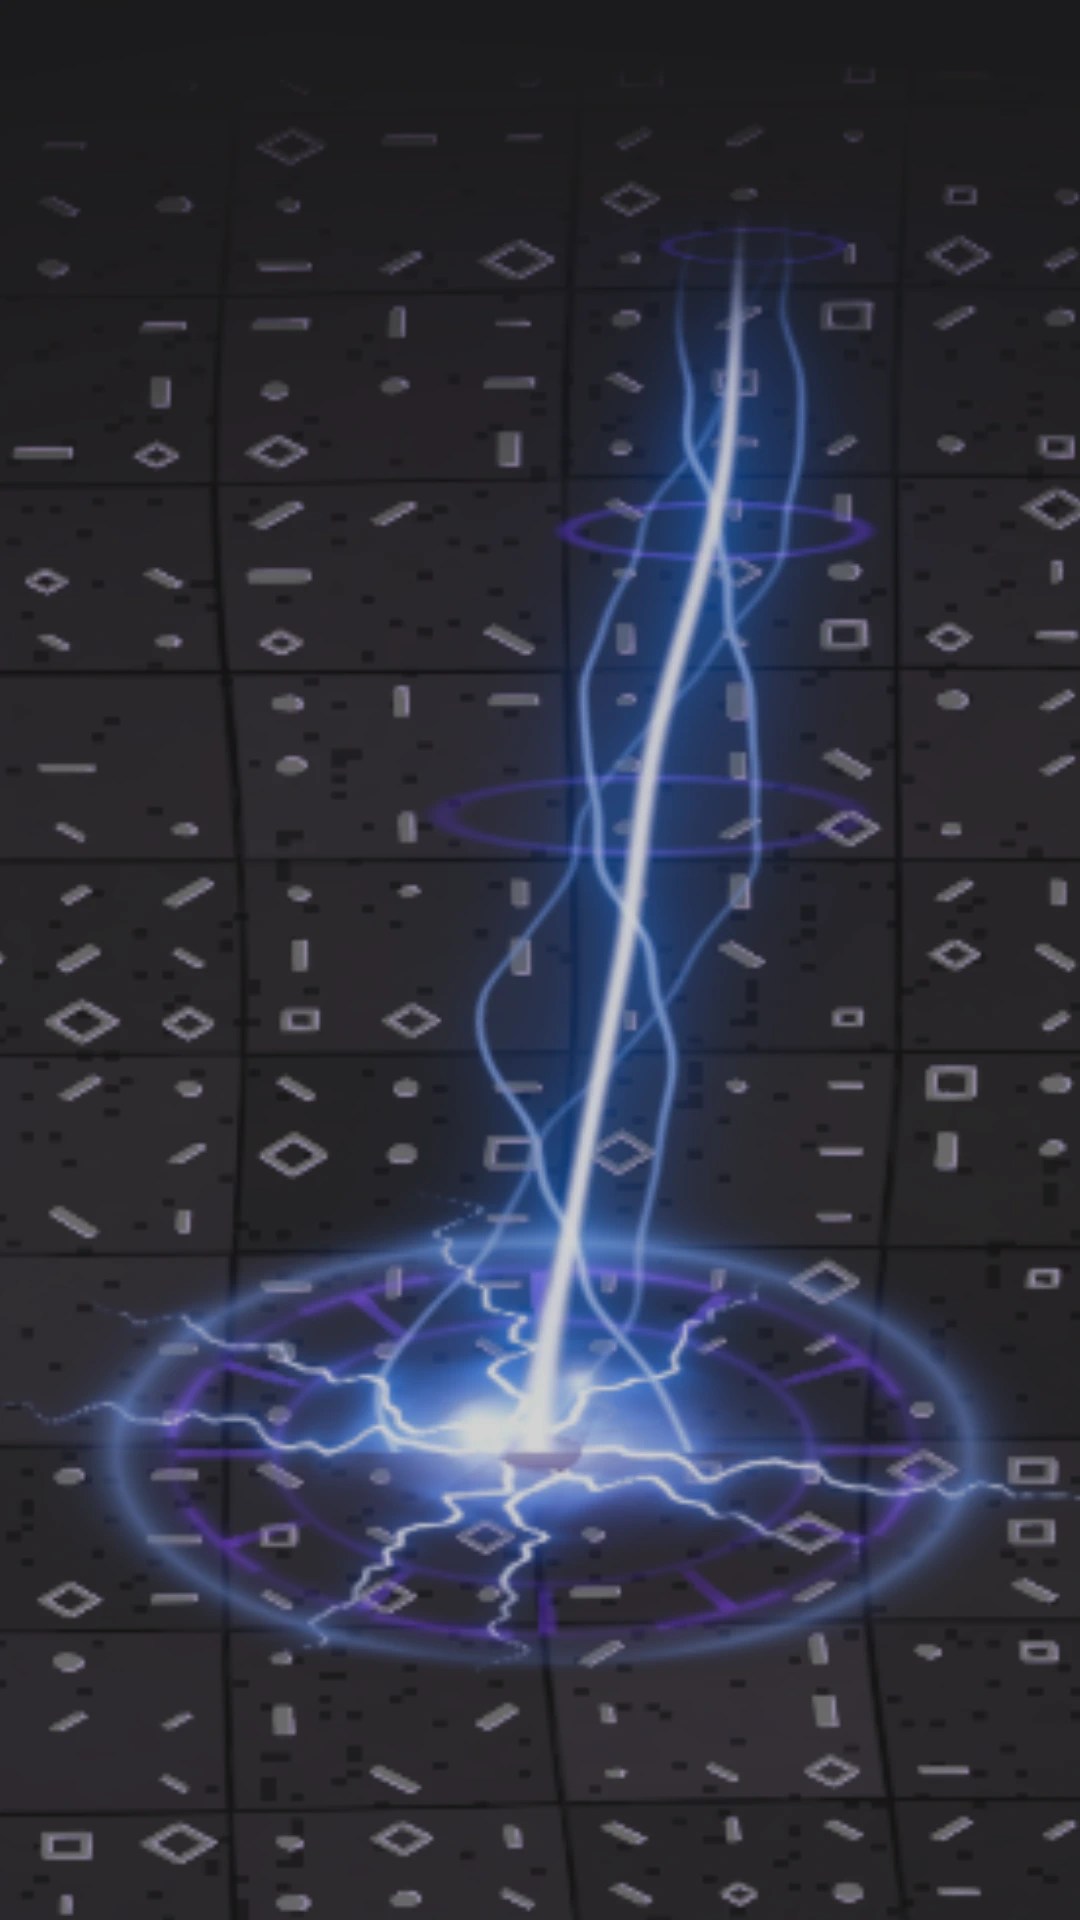
Examples of What You Can Create
- Auras, mana, glows.
- Frames, overlays.
- Ground, walls, patterns.
- Impacts.
- Healing, buff, hit effects, and more.
When you get the free Unity tool, run the Demo Scene to preview generated effects in world space and on the UI. Adjust & instantiate them in the required contexts to enrich your project with VFX.
What You'll Find Here
In this guide, we share our studio's approach to creating visual effects in Unity projects. It mostly comes down to Unity shaders combined with AI generation based on hand-made references.
The guide includes ready-to-use Unity VFX Shader Techniques, a prompt, and links to free & extended resources, so you can try everything yourself.
These approaches took us 4+ years of practice to develop, and we want to share them to free up more of other indie developers' time for creative work instead of routine.
Learn the shader and the material, learn the sample prefabs, learn how to spawn them. Practice on the free asset.
Buy the full Procedural VFX Toolkit when you want 50+ ready-made effects as examples, trails & touch effects, the wizard, the AI-agent skills and much more.
Studio Values
We're indie developers ourselves, and choose to strengthen the creative community, not by competing with AI, but by using it to amplify personal expertise. We value handmade work (most of our games' art is hand-drawn).
- Knowing the fundamentals. Shaders are generated from reference samples we developed ourselves, not taken from the internet. The extended guide also includes a section for readers who want to understand a shader's structure better.
- Competing with pure vibe coders and large corporations. It reminds us of waste sorting: while individuals make an effort one piece at a time for the sake of the environment, big corporations cause far greater harmful emissions. In this situation, we'd rather build tools for using AI as well and as sustainably as possible than give up its advantages altogether.
- Investments. Looking at a market oversaturated with AI technologies, we ask ourselves too: what should we invest in as an indie studio, which skills should we build, what should we learn as Unity devs, and which assets should we add for practice so we don't fall behind? This page is for those asking the same questions, and it's where we share a professional find.
Who This Guide Is For
This VFX creation guide is intended for experienced Unity developers who already have their own Unity projects. It's a good fit for you as:
- a Unity developer who needs effects but doesn't want to assemble them from dozens of third-party assets;
- an indie developer who can't afford a dedicated VFX artist;
- a mobile game developer who needs lightweight effects without a heavy particle system;
- a programmer who knows Unity but can't draw or animate custom effects;
- a small studio that needs a repeatable technique, not yet another set of pretty ready-made visuals.
Not required: drawing or programming skills, apart from some prototyping.
What We Mean by VFX and Why It Matters
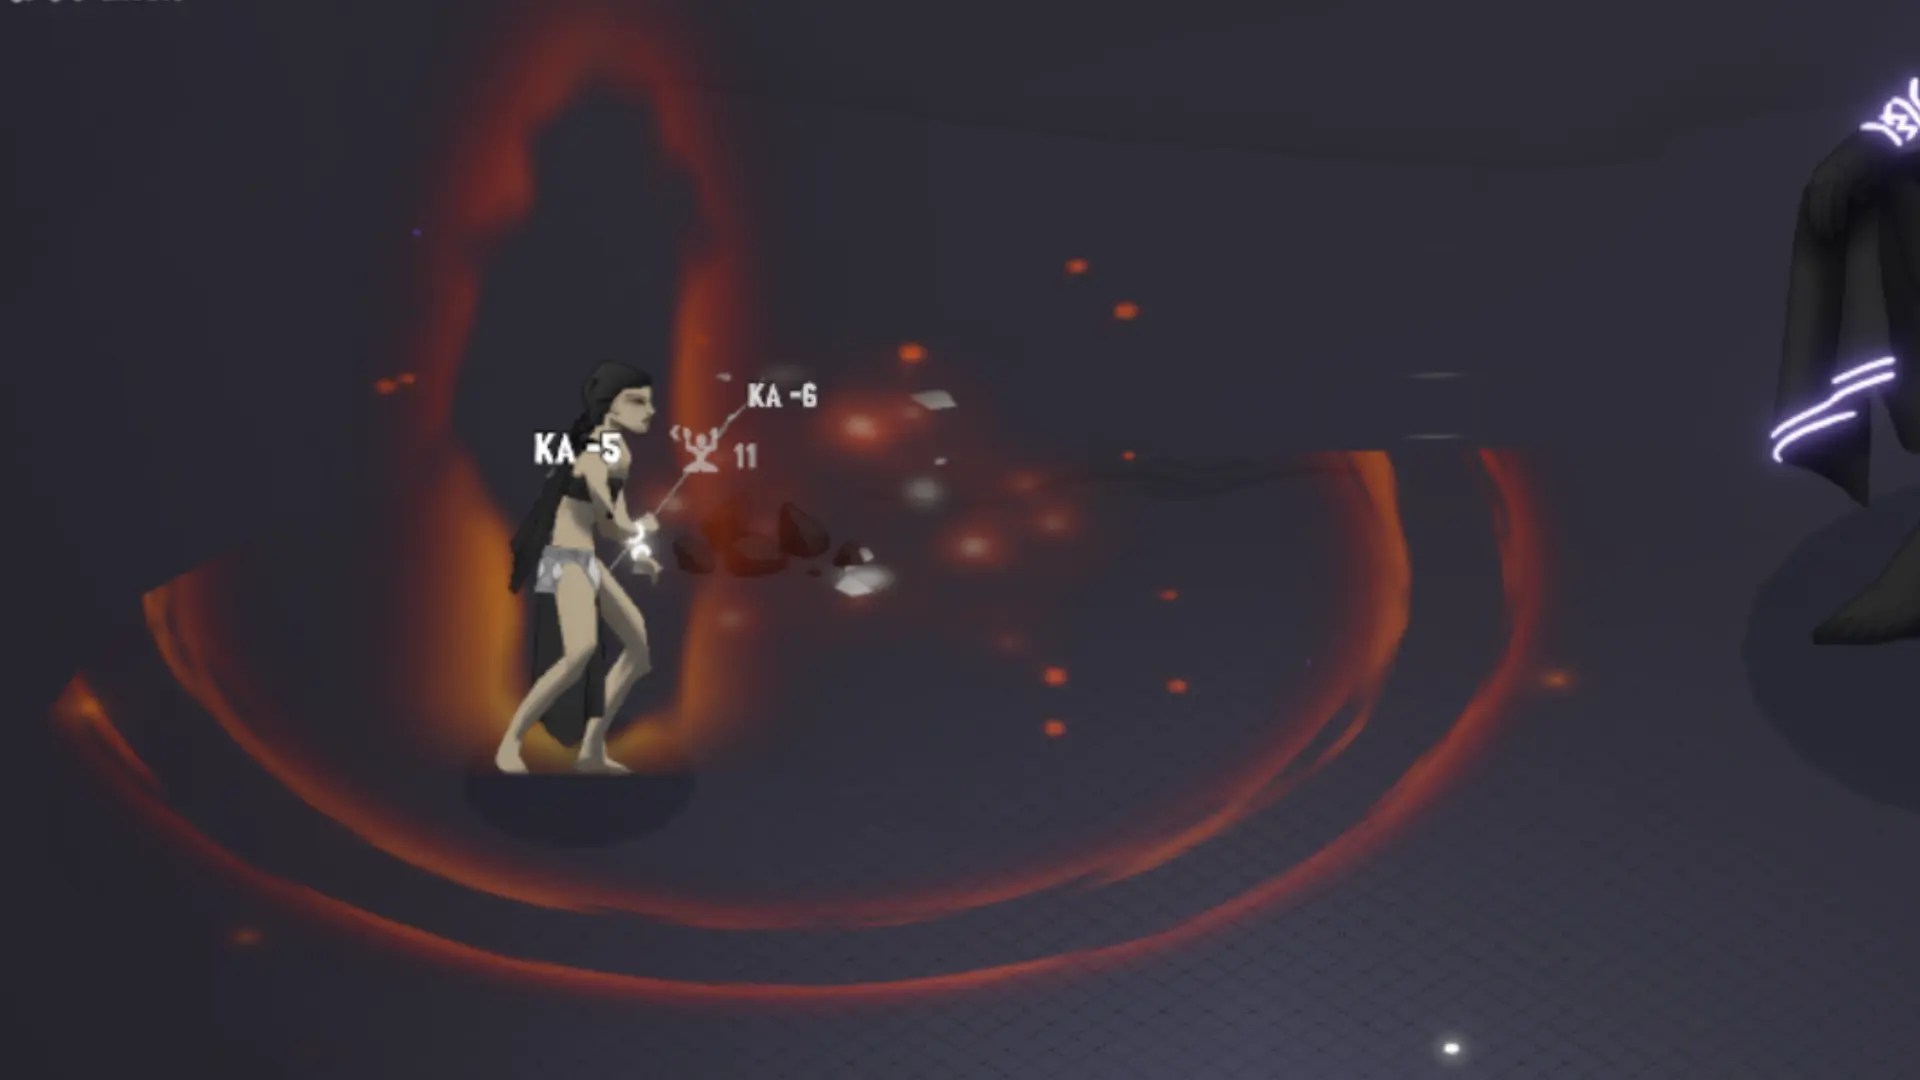
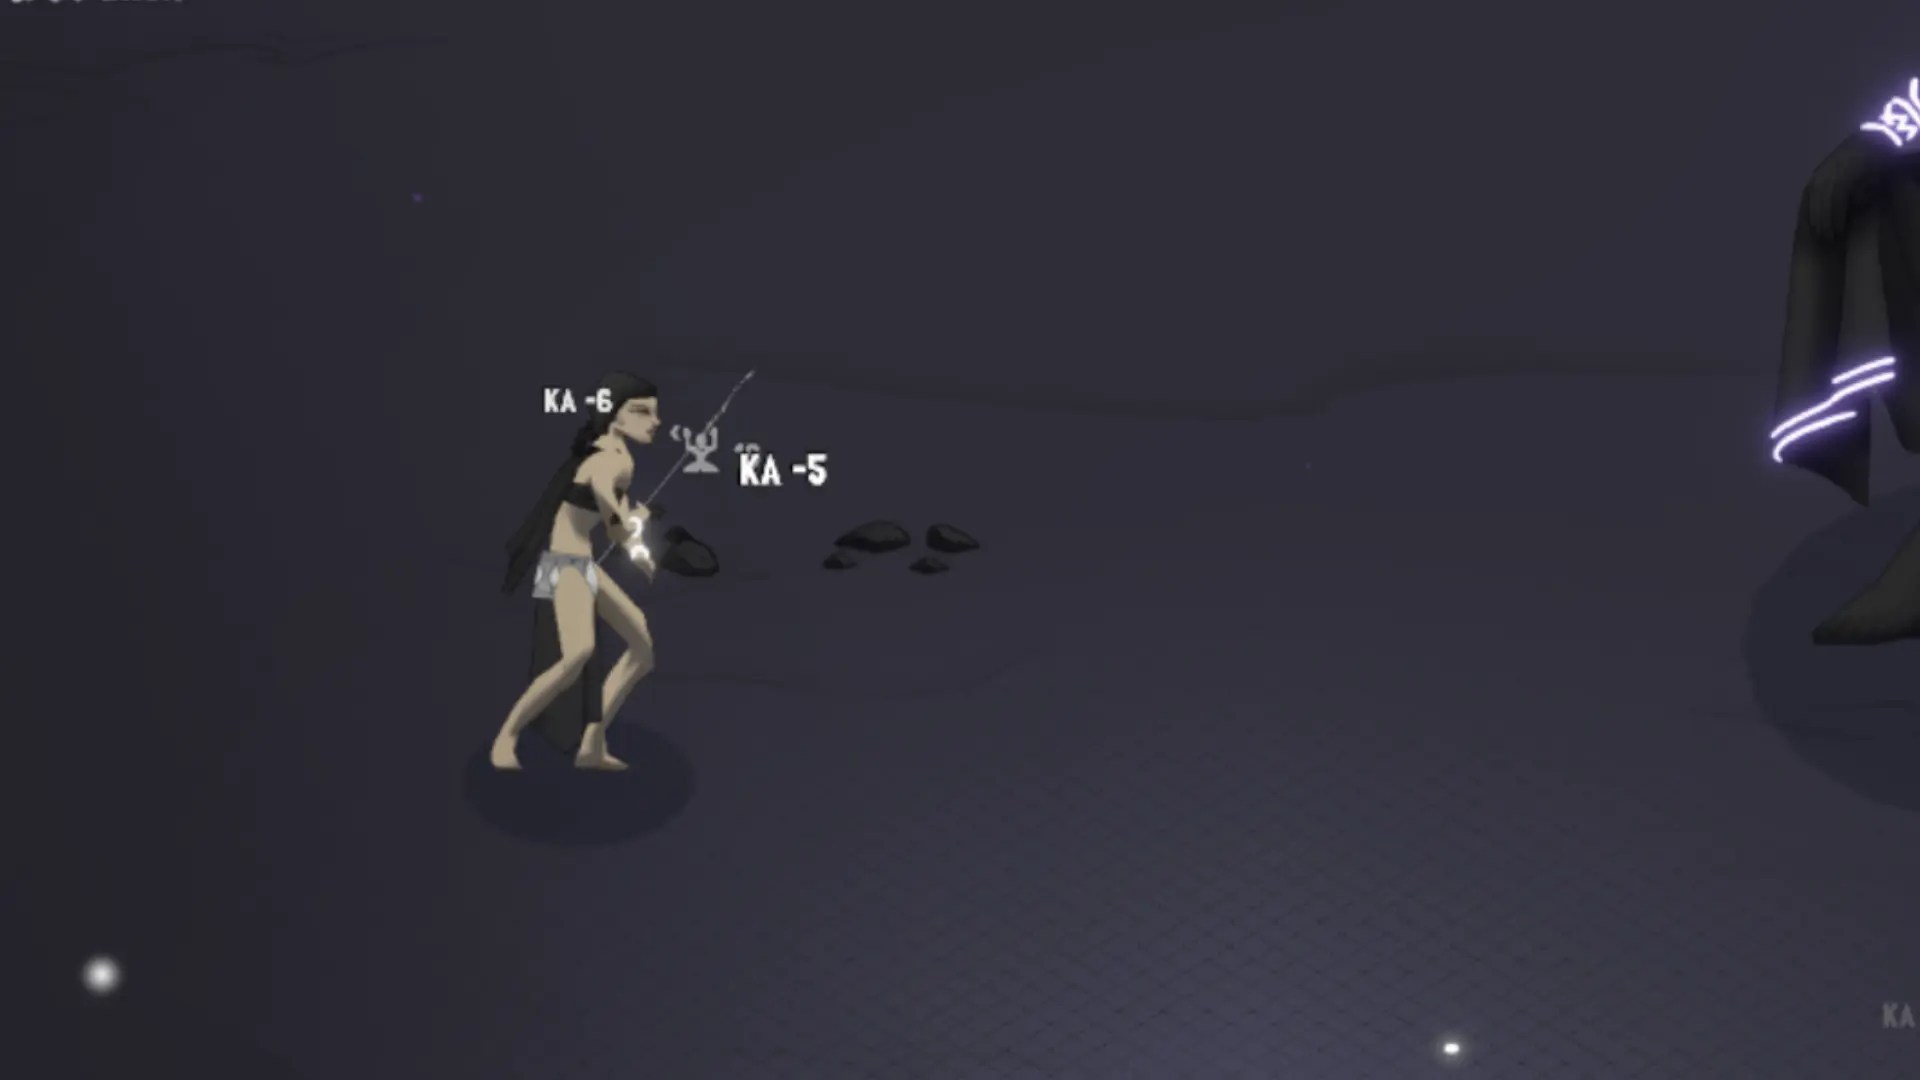
By VFX, we mean visual effects that respond to the player's actions, as well as temporary effects that guide the player by highlighting areas, characters, and so on (not baked backgrounds or interfaces). Technically, we mean instantiated effect objects placed in 2D/3D space and on the UI Canvas (not things like screen dimming or camera zooms). As developers, we see a game's VFX not as beauty for beauty's sake, but as a functional part of the game, just as important as gameplay, narrative, SFX, and the rest. The goals of quality VFX are to:
- Improve readability (for example, outline a skill's area of effect or show the impact of damage).
- Add juice, with effects that blend harmoniously into the rest of the gameplay and respond to the player's actions (for example, a distinctive visual touch response at the moment of a level-up or a purchase).
Quality visuals make your project stand out and easy to understand.
Our Approach and How We Got There
In our own practice as indie devs, we looked for ways to cut costs, automate processes, and make visual development easier, along with tricks and creative solutions. We used to build VFX the standard way: particle systems and script-animated particles. That meant processing a large pool of objects in the scene at once, plus project memory taken up by the particles' sprites. Later, we switched to Unity shaders for these tasks.
It all started when we, as Unity asset developers, came across a community member asking how to make a heat trail effect from finger input on a phone. We took on the challenge and spent a long time searching for an approach that was visually harmonious, optimized for mobile, and scalable. That's how our Touch Effect System was born. A shader effect with a spawn-and-fade cycle plays on a transparent UI particle, and a whole sequence of these particles on the Canvas forms the trail: the newest particles light up brightly, while the ones left behind in the chain gradually fade out and get reused. This approach had no noticeable impact on FPS, so we kept going. Once we saw that an effect could be animated inside a single particle, we tried something beyond a simple glow, such as a randomly generated fingerprint-style pattern for a single tap. That worked great on UI too, and it required neither sprites in the project nor any drawing. The shader architecture let us tune the visuals with numeric sliders.
With that result for touch effects, we decided to make them possible to generate independently of input, and not only on UI but in world space, so they'd become full-fledged spawnable VFX. Spawning a single particle on UI was an easy task (just detach it from input and call instantiation manually), but spawning the same shader effect in the world required a new structure that accounted for the differences between render pipelines. We needed a transparent material to act as a Canvas on which the shader effect plays, and we pulled it off. The flow works like this: an effect is written in the shader → a material is created from it → the material is assigned to a player component, which animates the effect on a flat quad with a mesh renderer. Position this quad correctly relative to the player's camera, and the effect looks convincingly volumetric, using just one particle and a lightweight shader calculation. Bringing all these capabilities together, we renamed the system Procedural VFX Toolkit.
I (Dariia Zodcha) also worked as a freelance full-stack developer. Whenever VFX was needed, I was mostly expected to grab free packs and pick effects to fit the project. Our shader-based approach saves search time.
Advantages of the Shader Approach
- Lightweight on disk. No textures needed - only a shader, a material, and a prefab per effect (a fingerprint touch shader weighs ~9.36 KB, its material ~1.35 KB; that's everything the effect needs).
- Optimized, with no noticeable FPS impact. One effect = one particle; the shader runs on the GPU without touching Transform or Canvas components, and mobile is supported with no textures at all.
- Easy customization. No redrawing or animation corrections. Everything is tuned with sliders, so no extra expertise is required.
- Scalability & consistency. Reuse effects or write new ones from the same template. No hunting for packs that match the project's style - create exactly what you need.
- Versatility. One shader works for UI or world space, in URP, HDRP, or Built-In RP.
Hands-On Practice
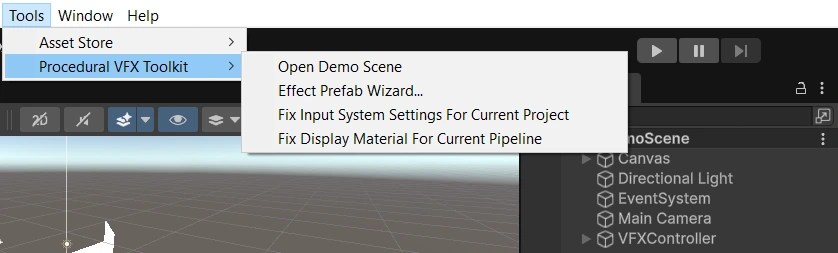
Manual setup
The effect plays on spawn and loops by default. To make it one-shot, uncheck Loop on the prefab. The Destroy On End option then becomes available.
Automated setup via the Tools menu
The effect plays on spawn and loops by default. To make it one-shot, uncheck Loop on the prefab. The Destroy On End option then becomes available.
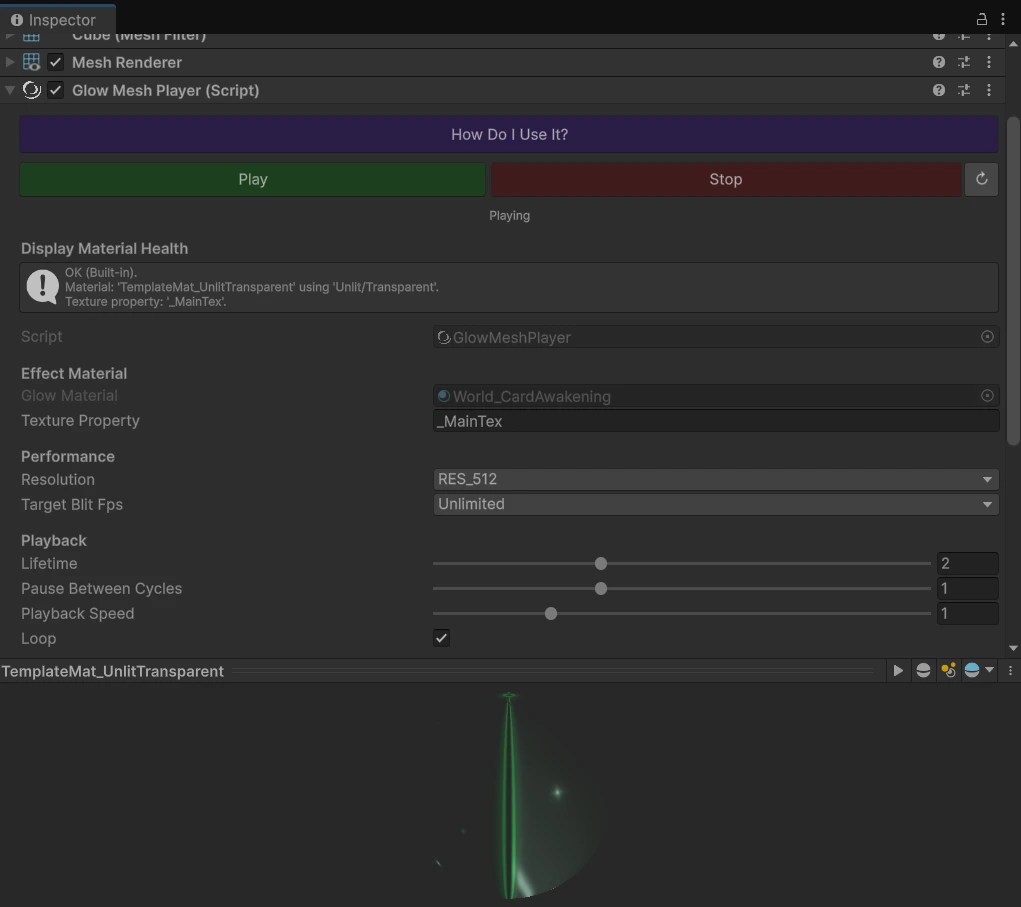
Manual effect tuning
VFX for 2D and 3D spaces spawn the same way: a prefab with a Mesh Renderer and a Glow Mesh Player component. The flat effect is easy to position in 2D between layers, and in 3D by facing it toward the camera.
// Assign the effect prefab reference in the Inspector
[SerializeField] private GameObject effectPrefab;

void SpawnVFX()
{
    GameObject vfxObj = Instantiate(effectPrefab);
    // vfxObj.transform.position = ...
    // vfxObj.transform.rotation = ...

    // No Play call needed: the effect plays on spawn
    // and removes itself if Destroy On End is on.
}Live effect tuning with VfxController
VFX for 2D and 3D spaces spawn the same way: a prefab with a Mesh Renderer and a Glow Mesh Player component. The flat effect is easy to position in 2D between layers, and in 3D by facing it toward the camera.
On VfxController
// On VfxController, add the new effect under its header:
public GameObject newEffectPrefab; // assign the prefabFrom your script
// Add a VfxController field to your script
// Assign the controller reference in the Inspector
[SerializeField] private VfxController vfxController;

// Call this from your script wherever the effect should appear:
// Vector3 effectPosition = set yours
vfxController.SpawnUniversalVfxEffect(vfxController.newEffectPrefab, effectPosition);

// The controller plays the effect and cleans it up.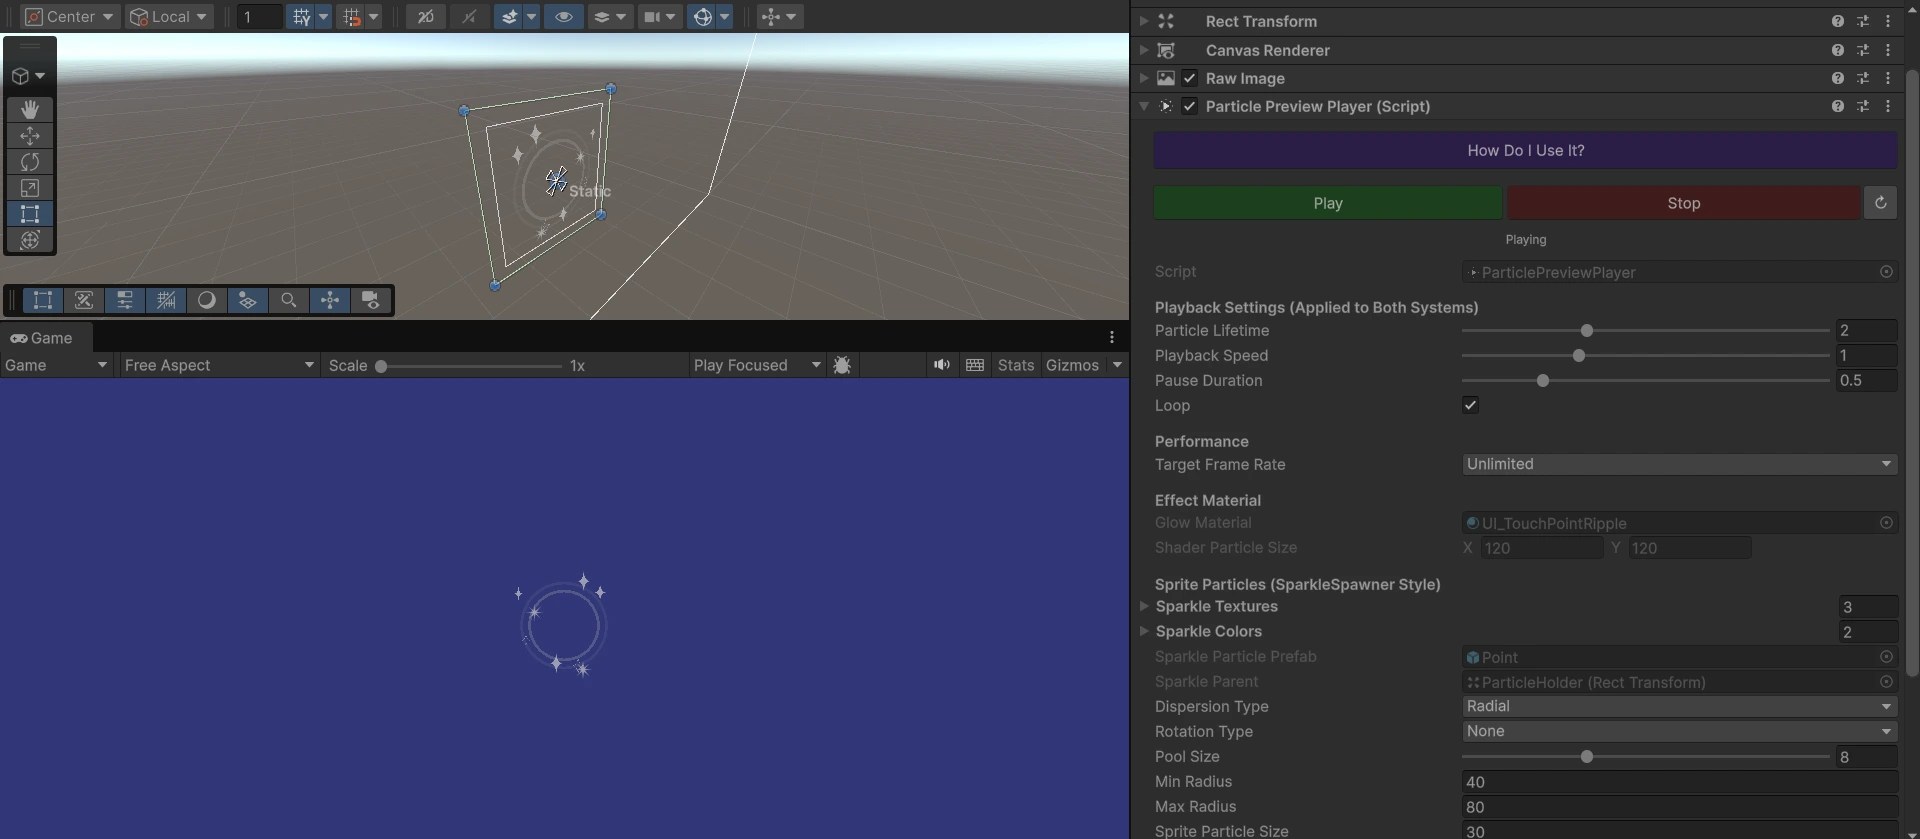
Manual UI effect tuning
To spawn a shader effect on the UI, use a prefab with RectTransform, Raw Image, and ParticlePreviewPlayer components. Like any other UI element, such an effect must be placed on a Canvas and respect its hierarchy.
// Assign both references in the Inspector
[SerializeField] private Transform canvasObjAsParent;
[SerializeField] private GameObject effectPrefab;

void SpawnVFX()
{
    GameObject vfxObj = Instantiate(effectPrefab, canvasObjAsParent);
    // vfxObj.transform.localPosition = ...

    // No Play call needed: the effect plays on spawn
    // and removes itself if Destroy On End is on.
}Live UI effect tuning with VfxController
To spawn a shader effect on the UI, use a prefab with RectTransform, Raw Image, and ParticlePreviewPlayer components. Like any other UI element, such an effect must be placed on a Canvas and respect its hierarchy.
On VfxController
// On VfxController, add the new UI effect under its header:
public GameObject newEffectPrefab; // assign the prefabFrom your script
// Add a VfxController field to your script
// Assign the controller reference in the Inspector
[SerializeField] private VfxController vfxController;

// Spawn this from your script centered on a UI element:
// Transform effectParent = set your UI element
vfxController.SpawnUiVfxEffectOnParent(vfxController.newEffectPrefab, effectParent);

// Or spawn anywhere on the Canvas by position:
// Vector3 effectPosition = set yours
vfxController.SpawnUiVfxEffect(vfxController.newEffectPrefab, effectPosition);

// The controller plays the effect and cleans it up.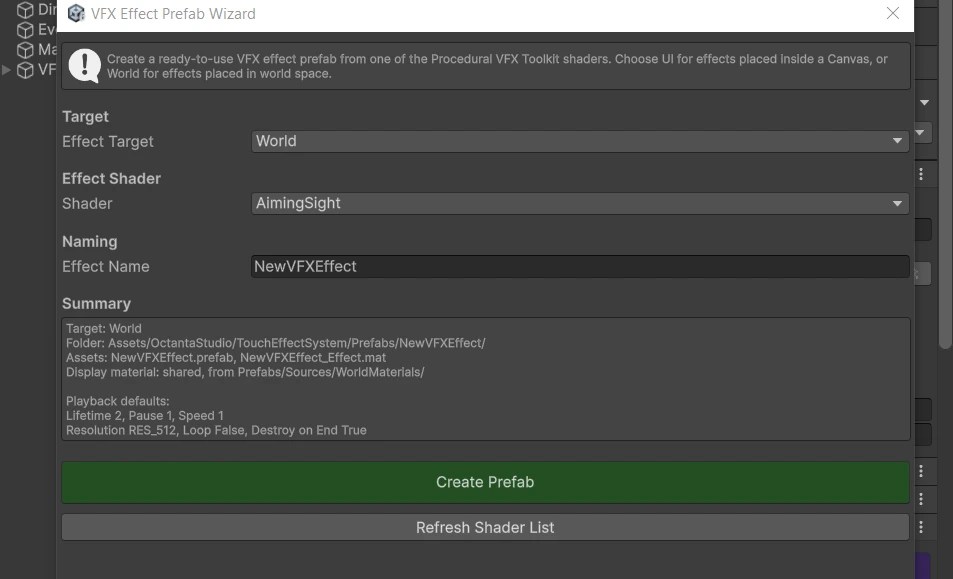
Manual effect creation
The main source of the visual effect is always the shader material. With a shader and its material in hand, you can create an effect for both the UI and world space by simply assigning a customized Glow Material to effect prefabs.
To create a new UI effect:
To create a new world effect, do the same:
Wizard-driven effect creation
From the two previous practice tabs, you've seen that the main source of the visual effect is always the shader material in the Glow Material field. With a shader and its material in hand, you can create an effect for both the UI and world space. The Wizard assembles that prefab for you.
To create a new effect:

Prompt workflow
AI can generate a shader for a new effect from your description. We prepared a prompt with embedded samples for this. You can view it on GitHub or download it below.
Example prompt
The description that produced the effect shown in the Example result section.
Create an effect featuring blue-and-white stars that burst outward in multiple directions, then gradually fade away. It represents the impact of a laser beam hit, with a bright neon aesthetic designed for a children's game. Make the stars more vector-like - no need to complicate the borders. Geometric effect, sharper. No need to layer them - just stars.

[Style references: my old particle systems / my sketch / my project screens / etc]Example result
A particle-based VFX from a personal side project was used as the reference. The screenshot and a text description were enough to generate a shader effect that is much lighter and more flexible to implement.
The full Procedural VFX Toolkit includes long input trails: visual feedback that follows touch and pointer input. They add polish to mobile apps at little cost, and they help visualize interactions in tutorials and video demos.
How trails are built
It all started with one glowing dot, animated inside a particle. That is why the components are named what they are (GlowMeshPlayer) - the glow came first.
Touch trails live on the UI and are made of many "glowing" particles, each playing a shader effect - the TouchGlowUI component drives them. The system also supports effects built from ordinary sprites, handled by the SparkleSpawner component. The two can be combined: see TouchGlowTrailFairy + TouchStarTrail.
Creating a Trail from a Shader
A blade is the same trail logic, with extra tapering at the ends. It brings Fruit Ninja-style visuals to combat systems and fits quick gestures and dynamic gameplay.
Creating a Blade from a Shader
Three-Color Gradient
The blade's richness comes from the shader's ability to blend colors smoothly over the effect's lifetime: start, middle, and end. No textures, no extra particles - one shader carries the full palette shift. The shape also shrinks rather than fades, so the edge stays sharp at every stage. The TouchPointGradient shader fits blade materials well.
Earlier sections covered long trails that follow input. Here the focus is one-shot effects triggered by a tap. They are built from shader particles, sprites, or text - your choice. Every touch effect attaches to the Canvas of the scene once, then responds to input automatically at runtime.
Shader Effects
The focus is TouchGlowUI → Glow Material, which shapes the touch effect's visuals. Adjust it or swap it for any other shader material in the system, and iterate outside Play Mode. If the material used by the effect has hold logic enabled (for example, the TouchRadialSparks effect), the effect keeps playing until the user lifts their finger.
Sprite Effects
The focus is SparkleSpawner and its settings. Assign textures, their colors, and animation types. Example: the TouchGlitter prefab.
Text Effects
The focus is TouchTextUI and its settings. Assign strings, fonts, colors, sprite assets, and animation types. Example: the TextEffectLoot prefab. Prefer universal characters and numbers here, so the effect does not need localizing.
All such VFX in the system reference the InputController - configure input behavior there for what you need. Add sounds, read only a specific mouse button, recognize touches only on specific layers, tags, or objects, or call a touch effect manually.
What You Gain
Mastering our Unity VFX Shader Techniques takes a few things: an understanding of how a shader and the material made from it are structured, familiarity with the sample effect prefabs for different use cases, and the ability to spawn an effect prefab in the right context.
In return, you get lightweight, optimized VFX that can be customized for your project, a system you can use as a foundation for building new effects, and coverage of different devices and render pipelines with flexible settings. This gives you:
- Time savings. No hunting for a suitable effect, no reworking someone else's, no building a new system from scratch.
- Independence. No reliance on a suitable asset or a specialist being available: you can create what you need yourself.
- A portable skill. Learn the principle once and apply it across different projects, games, and situations.
This system was originally meant to ship together with a custom-effect service for other developers. In the end, we wrote this guide instead, so you can build them yourself and keep full autonomy over your project. That said, we still need to make a living - and we're open to exchange, so the full Procedural VFX Toolkit is available to buy.
Extended Guide
Practice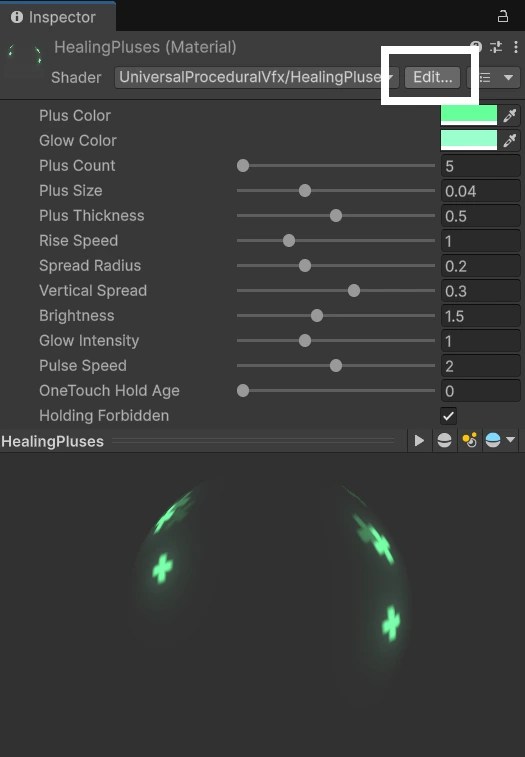
-
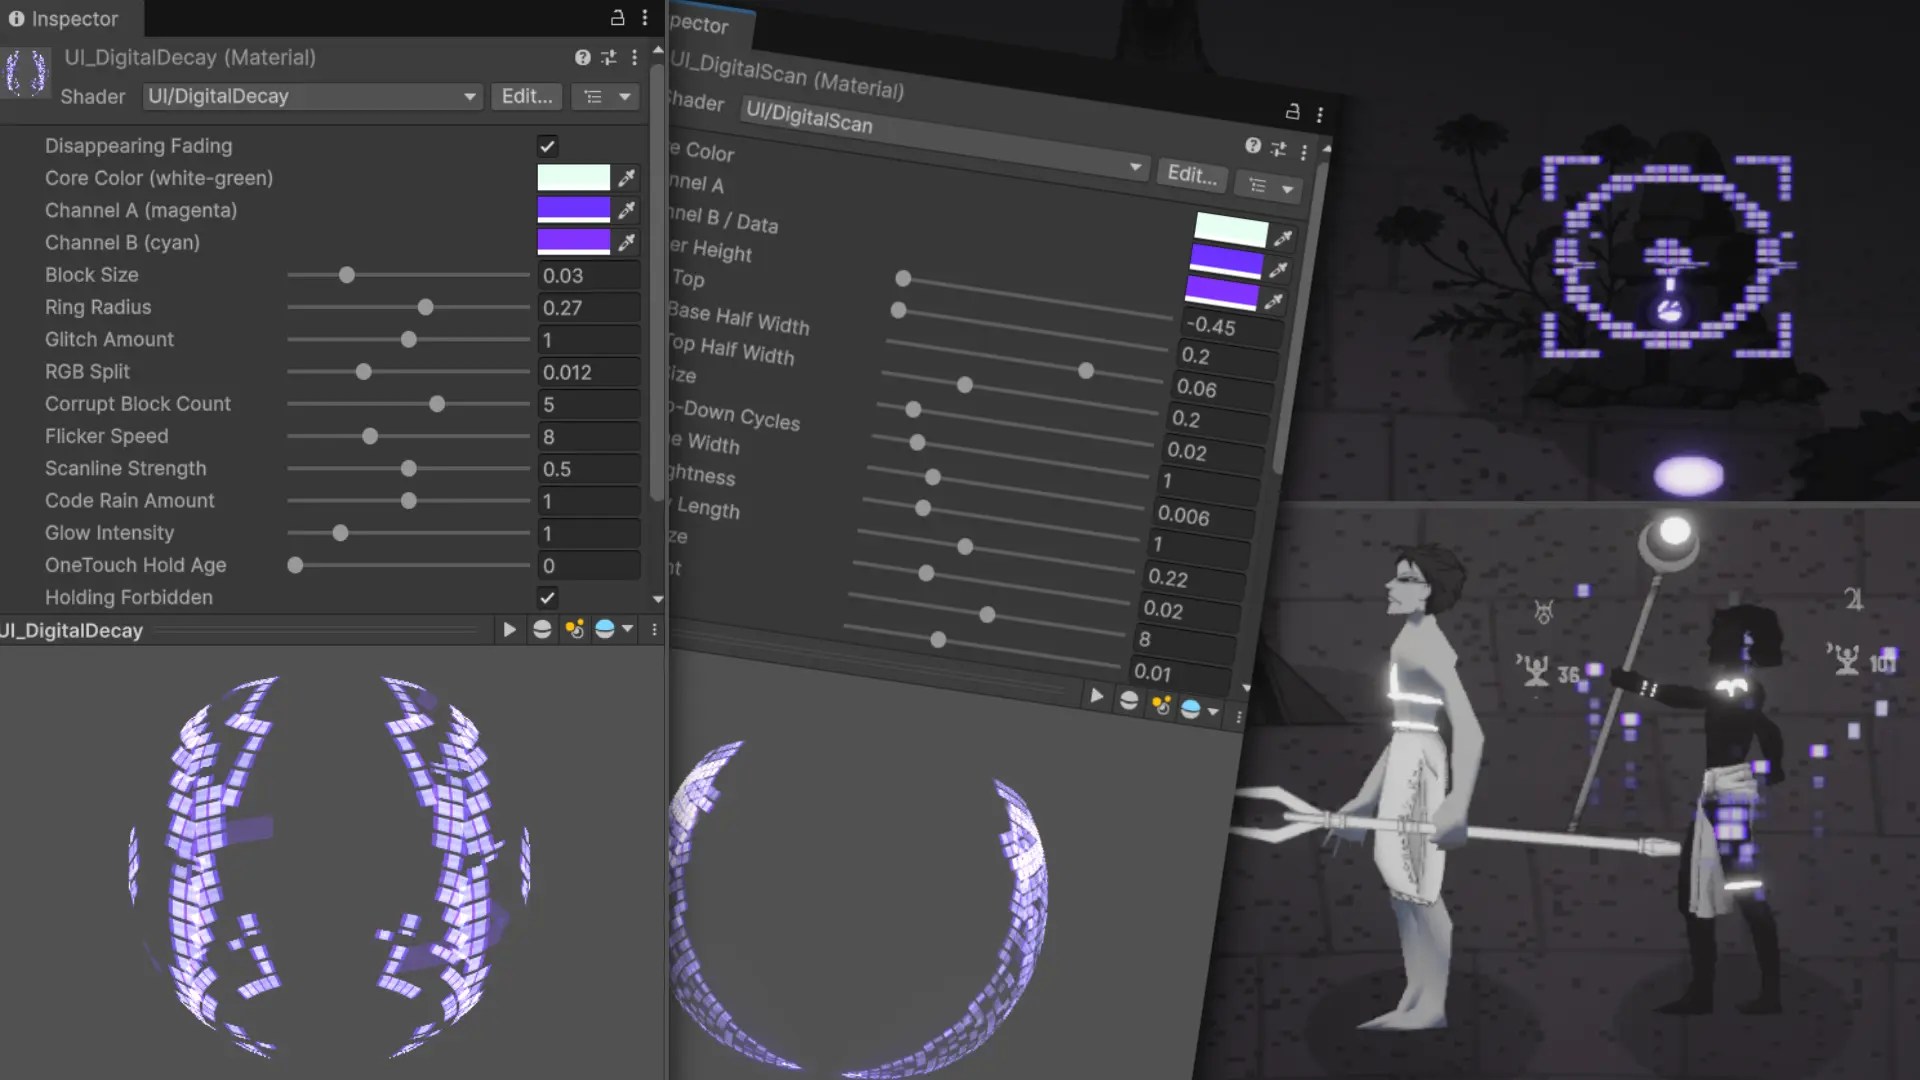
A shader material is where the effect gets tuned. Edit its sliders and preview the cycle right in the Inspector. If available, drag the OneTouch Hold Age slider to see an approximate animation without entering Play Mode.
-
You are not limited by what the material offers: edit shader properties, raise a size's max for a bigger effect, lower a count's min for a lighter one, and so on. Some shader parts are yours to edit, and some need to stay intact for the structure to keep working. Every shader in this system has the same frame: only the picture changes. Click a part to see what it does, and whether it is yours to change or works by itself.
Name
Every shader opens with a name that looks like a path.
Shader "UniversalProceduralVfx/HealingPluses"- Keep
UniversalProceduralVfx/. It is the shared folder, and the Wizard finds your effect through it. - Yours: the last word. It is the effect's name: HealingPluses, Fireflies, RadialSparks.
Properties
Hidden system fields first, then the sliders for the designer, then the hold behavior.
[HideInInspector] _TimeNow ("Time Now", Float) = 0[HideInInspector] _StartTime ("Start Time", Float) = 0[HideInInspector] _Lifetime ("Lifetime", Float) = 2.5…[HideInInspector] _RandomSeed ("Random Seed", Float) = 0_PlusColor ("Plus Color", Color) = (0.4, 1, 0.6, 1)_PlusCount ("Plus Count", Range(5, 20)) = 5_PlusSize ("Plus Size", Range(0.02, 0.08)) = 0.04…_OneTouchHoldAge ("OneTouch Hold Age", Range(0.0, 1.0)) = 0[Toggle] _HoldingForbidden ("Holding Forbidden", Float) = 1- Auto: the hidden fields. The player writes
_TimeNow,_StartTime,_Lifetimeand, when the shader has it,_RandomSeed- a fresh one on every spawn. The last two lines are read byTouchGlowUIon the Canvas. Leave them as they are._RandomSeedis the hook for randomizing anything visuals: pick a parameter, mix it with the seed in the shader, and each spawn will be a little different. - Yours: the open sliders. Edit a default, widen a
Range(...)for a bigger effect, narrow it for finer control.
SubShader
Tells Unity how to draw the effect: as a transparent object that never hides what is behind it.
Tags { "RenderType"="Transparent" "Queue"="Transparent" "IgnoreProjector"="True" }Blend One OneCull OffZWrite OffZTest LEqual- Keep: the transparent queue,
Cull OffandZWrite Off. The effect is drawn after solid objects, on both sides, and without writing depth. - Yours:
Blendis the one choice here.One Oneadds light (glows, sparks, fire).SrcAlpha OneMinusSrcAlphadraws ordinary see-through shapes. Pick it once, when you design the effect.
Pass and vertex
The vert performs 2 tasks: it transforms the quad’s vertices into clip space (using UnityObjectToClipPos) - to put the quad on the screen - and passes along the UVs, a 0 to 1 coordinate across the quad.
#pragma vertex vert#pragma fragment frag…float _TimeNow, _StartTime, _Lifetime;float4 _PlusColor, _GlowColor;float _PlusCount, _PlusSize, _PlusThickness;…v2f vert (appdata v) { o.pos = UnityObjectToClipPos(v.vertex); o.uv = v.uv;}- Keep:
vert. It is the same in every shader. The whole picture is drawn per pixel infrag. - Yours: the declarations repeat every property from Properties under the same name. A property that is added but not declared here is a common syntax error: the shader fails to compile.
Fragment
The frag runs once for every pixel of the quad and answers with that pixel's color and opacity. This is where the effect is drawn: the four parts below are its steps, in the same order as the list on the left.
fixed4 frag (v2f i) : SV_Target {… return float4(finalColor, finalAlpha);}- Keep: the signature.
i.uvis the 0 to 1 coordinate of the current pixel, interpolated from the UVs thatvertpassed along. Every shape in the picture and the edge fade are measured from it. - Yours: the picture in the middle. The clock, the edges and the return around it stay as they are.
Age
The effect's clock. age runs from 0 (just born) to 1 (finished).
float age = (_TimeNow - _StartTime) / _Lifetime;…if (age < 0.0 || age >= 1.0) return float4(0, 0, 0, 0);float effectiveAge = age;if (_HoldingForbidden == 0) { effectiveAge = min(age, _OneTouchHoldAge);}- Auto: the clock values come from the player. You never set them in the shader.
- Keep: outside 0 to 1 the pixel is fully transparent right away, so nothing shows before the start or after the end.
effectiveAgeisagewith the hold rule applied, and the picture reads this one.
The picture
Everything you see is made here: shapes, motion, colors, pulses. It is different in every effect, and it is the part you design to fit your project.
float lifeFade = sin(effectiveAge * 3.14159);…for (int p = 0; p < 20; p++) { if (p >= plusCount) break; … float plusCore = softPlus(toPlus, plusSize, _PlusThickness); … finalColor += _PlusColor.rgb * plusCore * pulse * naturalFade * _Brightness; finalAlpha += plusBrightness;}- Yours: the shapes and the motion are written from scratch for each effect. They read the sliders from Properties and add up two totals,
finalColorandfinalAlpha. - Keep the rule: the effect starts fully transparent and ends fully transparent. A curve like
sin(age × π)does it: it rises from 0 to 1 and falls back to 0.
Edges
A soft fade toward the border of the square, so the effect never ends in a hard cut.
float2 edgeDist = min(i.uv, 1.0 - i.uv);float edgeFade = smoothstep(0.0, 0.25, min(edgeDist.x, edgeDist.y));- Keep:
edgeDistis the distance to the nearest side of the square. - Yours:
0.25is how wide the soft border is. A bigger number means a softer border and a smaller effect. A smaller number leaves more room for the effect.
Return
The shader gives back one answer per pixel: a color and how opaque it is.
float timeFade = 1.0 - smoothstep(0.75, 1.0, age);finalAlpha *= lifeFade * edgeFade * timeFade;finalColor *= lifeFade * edgeFade * timeFade;…return float4(finalColor, finalAlpha);- Keep:
float4(color, alpha)is always the last line offrag. The fades are multiplied in right before it: whatever the picture does, the pixel is invisible at birth, at the end and at the border, so the effect blends into any scene.
Fallback
A safety net at the very end of the file.
Fallback "UI/Default"- Keep: when a device cannot run the shader above, Unity switches to this simple built-in one. It is the same last line in every file.
What every shader shares
Whatever the picture inside, most effects work by the same rules. A shader in this system should have:
- Life cycle from 0 to 1. The player scripts of the system drive it.
- A transparent background with the picture inside the particle quad. This makes the effect sit seamlessly over the game world, not as a colored square.
- An alpha of 0 at the start and at the end. That gives a smooth appearance and fade-out.
- Random seed (optional, present in most effects). Anything the shader draws can be tied to
_RandomSeed- in the HealingPluses example, it shifts the positions and sizes of the pluses, so no two plays look the same. - Hold behavior (optional, present in most touch effects on the UI). Holding is allowed for touch effects on the Canvas when
_HoldingForbiddenis off._OneTouchHoldAgethen picks the moment to freeze at, from 0 (start) to 1 (end). The effect holds there while the finger stays down - still or looping in place - and fades once it lifts.
It is marked as mandatory in the shipped AI prompt. The next section shows which visuals fit into the system.
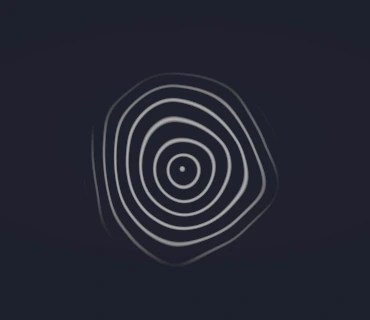
The shader's frag is where the effect is drawn. The direction of motion within the particle is what distinguishes a hit effect from an aura. Before creating a shader, decide how the internal visuals should move. Effects can also combine multiple directions rather than relying on just one.
Common directions
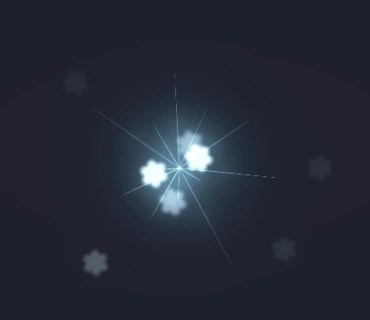 Radial
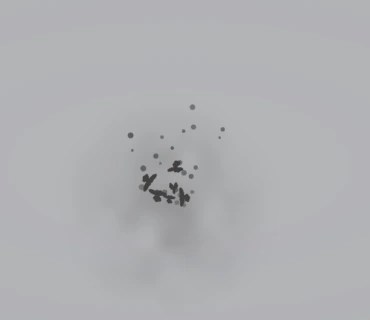 Vertical
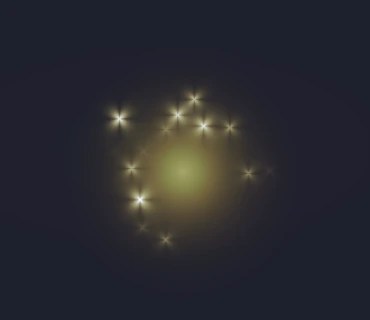 Rotating
 No movement
Worked Example: Lightning Strike
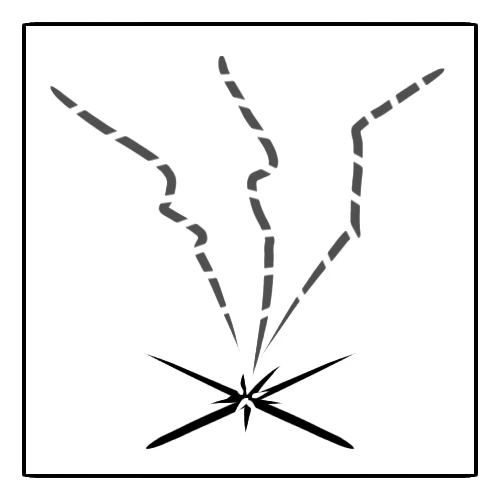
In our studio's practice, we designed a lightning strike as a shader effect. Its strike point sits at a fixed spot at the bottom of the transparent quad and is then attached to the target in the scene. _RandomSeed drives the bolt: it stretches from a random top corner of the quad down to that strike point, so spawned strikes look organic and varied. The effect never leaves the particle bounds.
-
If you use multimodal generative AI, feed it your layout sketch built on the same principle. The more concrete the layout in the prompt, the closer the generated effect gets to the visual you want.
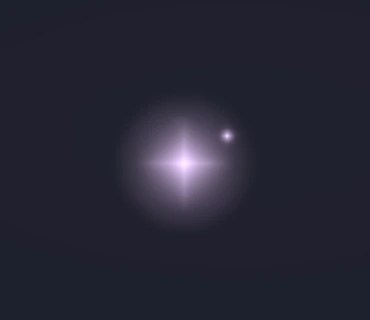
Suppose your task is to outline a character's area of effect (one that grows with the player's upgrades), or show a strong hit differently from a weak one. There are three ways to handle it.
-
Create two materials from the same shader and re-tune one - or start from the shipped pair
UI_HealingSparkandUI_HealingAura: same shader, different look. Then duplicateTemplateUIEmptytwice (UI effect prefab template), drop a material into each copy, rename the effects, and spawn whichever fits your case.
-
If you need more complex variations than two or three prepared assets, move to the script-based methods. When you instantiate the effect in the scene, multiply its scale by the parameter you need. The built-in
VfxControllerspawn methods return the spawned effect, so you can do this:// Call this from your script wherever the effect should appear: // Vector3 effectPosition = set yours GameObject spawnedEffect = vfxController.SpawnUniversalVfxEffect(vfxController.newEffectPrefab, effectPosition); // the spawned effect float damageValue = 2; // your damage value spawnedEffect.transform.localScale = spawnedEffect.transform.localScale * damageValue; -
Scaling from the previous approach is often enough, but stretching can spoil the effect's appearance and does not let you influence anything other than the Transform. If the shader exposes a property, for example a radius slider, push the value straight into the material. Make sure the prepared effect's Transform is large enough to fit both the minimum and the maximum radius of the internal visuals. Make sure the material is not shared with other effects, and do not make the change in Update: set it once before instantiating the effect.
Assign the material
// In your script, assign a reference to the material of the effect you use [SerializeField] private Material effectShaderMaterial; // Better to cache once: the default radius from the material private float baseBurstSize = 1;Set the value at spawn
// When you spawn the effect for your context, pass in the current multiplier
float characterRadius = 2; // your radius, for example

// Check the shader actually exposes _BurstSize before writing to it
if (effectShaderMaterial.HasProperty(Shader.PropertyToID("_BurstSize"))) // example radius slider
{
    float mult = characterRadius;
    float reqRad = mult * baseBurstSize; // correction for the shader's own scale
    effectShaderMaterial.SetFloat("_BurstSize", reqRad); // pushed into the shader, affects rendering
}
This section is mostly about 3D - on the Canvas, placement is simple: put the element above the others, in the right spot, use masks and other UI features. For quads in world coordinates, the setups vary. A world-space VFX is a flat, transparent Canvas that plays a visual inside, so it can be arranged in quite a few ways. Here are the common ones:
-
Choose the object to attach the VFX reaction to: a playing card that needs a "reveal" effect, a top-down strategy figure that needs a ring (hula-hoop-like) indicator showing an attack, or an object that triggers an explosion on contact. Create an empty child under the target and spawn the effect inside it. From then on, the parent's movement and rotation carry the effect with it. Reset the local transform so the effect sits exactly at the marker:
GameObject vfx = Instantiate(effectPrefab, spawnPoint); // spawnPoint: the parent's marker Transform vfx.transform.localPosition = Vector3.zero; vfx.transform.localRotation = Quaternion.identity; -
This approach is for portals, smoke, fire, and ground impacts: the quad stands perpendicular to the ground. Instantiation needs the correct position and rotation so the effect looks volumetric relative to the player. This is billboarding: the quad keeps facing the player's view, so it reads as solid from any angle. Write the script yourself, or start from this sample:
using UnityEngine;
public class FaceCamera : MonoBehaviour
{
    [SerializeField] private float yawOffset = 0f; // extra rotation of the object around the vertical axis, in degrees
    private Transform cam;
    private void Awake() { cam = Camera.main.transform; }

    private void LateUpdate()
    {
        Vector3 camForward = cam.forward;
        Vector3 camRight = cam.right;
        Vector3 up = Vector3.Cross(camForward, camRight);
        transform.rotation = Quaternion.LookRotation(-camForward, up);
        transform.Rotate(Vector3.up, yawOffset);
    }
}
Which simple way to optimize a shader effect have we already covered?
Not quite. Still a smart trick: a UI particle plays the effect more cheaply, because it skips the extra material on a mesh renderer.
Close! A different method came up earlier, but this one is very effective too for world VFX. The fewer pixels the player has to draw, the lighter your build.
Correct! The fewer separate elements the GPU has to animate, the better the performance. That is also why soft, misty effects are the cheapest.
Not quite. The shader runs over a RenderTexture, not per screen pixel of the quad, so shrinking the quad saves almost nothing.
Approaches to optimization
Poorly optimized effects can look great and still cause glitches and stutters, so the Procedural VFX Toolkit offers several ways to optimize effect performance, depending on the scenario.
-
For example, open the VFXFireAbsorbtion prefab with the GlowMeshPlayer component. Set a smaller Resolution (256, for example) and a lower Target Blit FPS. In Play Mode, drag the prefab into the scene and see how the change affects the effect's visual and the FPS.
-
For example, open the TouchGlowTrailHeat prefab with the TouchGlowUI component. Lower Desktop Max Points and scale the mobile count proportionally. In Play Mode, place the effect on the Canvas, click inside the Game view, and see how the change affects the effect's visual and the FPS.
-
For example, open the shader material of an effect you made yourself. Check which visual elements have a count (sparkles, dust, dots) and lower that count. Test how the change affects the visual where you use the effect.
PDF documentation on GitBook
The asset's main documentation lives on GitBook. Download it in the Prompting & PDF section.
AI Skills inside the package
The asset ships with AI skills built to meet Unity Asset Store recommendations. To use them, open your AI assistant (Unity AI, Claude Code, Cursor, and so on), give it access to the asset at Assets/OctantaStudio/TouchEffectSystem/AI/Skills/, and work with AI support that way.
Free vs Full Version
The full Procedural VFX Toolkit makes creating effects faster and more convenient with built-in Tools and a Wizard.
Procedural VFX Mini
Free- Randomized effect playback: a unique look on every cycle
- Shader-based universal effects for UI and world space
Procedural VFX Toolkit
- Glitch-free rendering
- 50+ shader variants and ready-made prefabs
- Editor Tools, Wizard and VfxController
- Effects that react to player input
- Sprite-based effects (SparkleSpawner)
- Text-based effects (TouchTextUI)
- Technical support and custom effects
Useful Resources
- Unity resources on shaders
- ShaderLab language reference
- High-level shader language (HLSL) on Microsoft Learn
- Procedural VFX Mini page in the Unity Asset Store
- Procedural VFX Mini documentation
- Procedural VFX Toolkit thread on Unity Discussions
- Procedural VFX Toolkit page in the Unity Asset Store
- Procedural VFX Toolkit documentation
- Shader generation prompt: preview page on GitHub
- The studio's website: octantastudio.com
octantastudio@gmail.com
All content © 2022 by Octanta Studio is licensed under CC BY-NC-ND 4.0.


